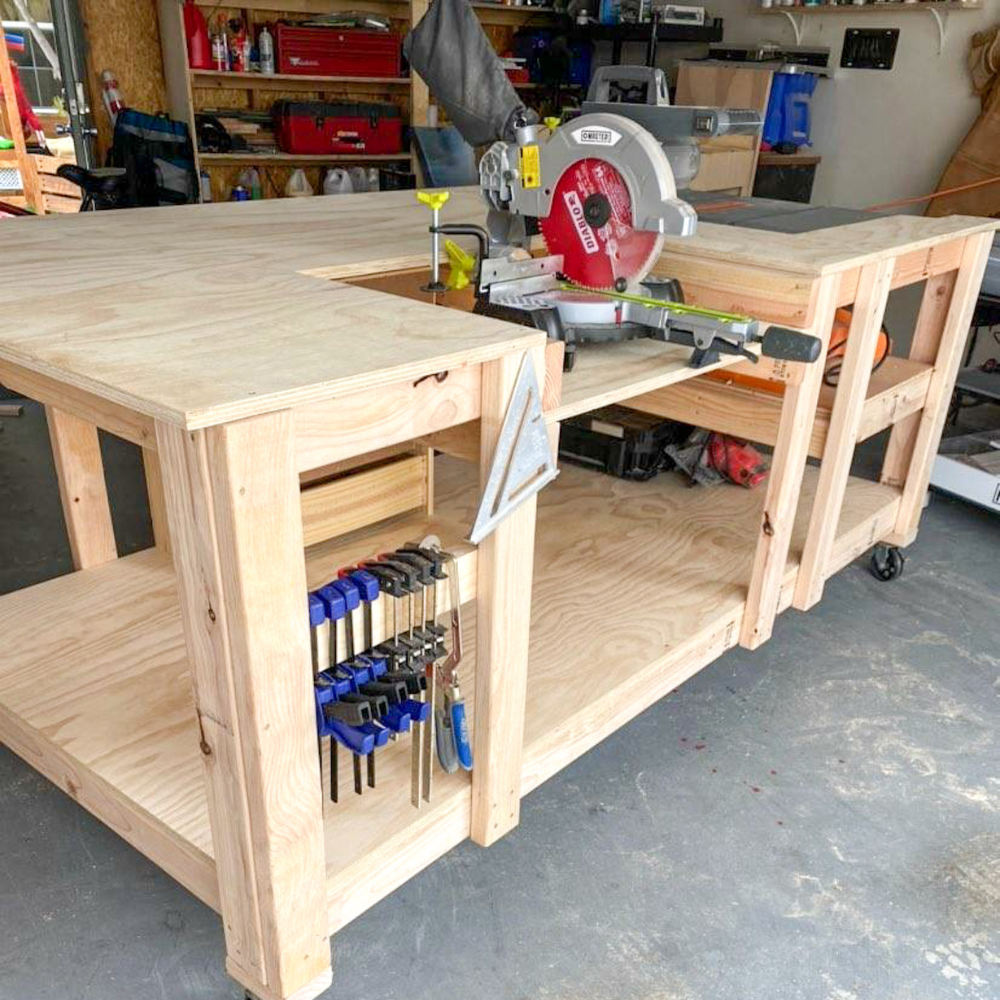

Alright, you want to build a workbench with a built-in table saw? That's a serious upgrade for any workshop. Here's the breakdown:
Why Build a Combined Workbench/Table Saw Station?
Space Savings: This combo takes up less real estate in your shop, giving you more room for projects and tools.
Work Flow: Imagine moving seamlessly between cutting on the saw and working on the bench â€" way less back and forth!
Versatility: You get a solid workbench for everything else you do, plus a dedicated saw setup. It's the best of both worlds.
The How-To: A Detailed Breakdown
1. Plan Your Design:
Dimensions: Measure your space and figure out the ideal size. You'll need room for the saw, workbench top, and possibly storage.
Materials: Choose your lumber â€" solid wood like oak, maple, or birch is great for durability. Consider plywood for the top if you're going for a budget-friendly option.
Saw Type: Your table saw’s size and features will determine the workbench design. Consider a mobile base for easy maneuverability if you already have a saw.
2. Build the Workbench Base:
Frame: Start with sturdy 2x4s for the frame, creating a rectangular base with strong joints. This is your foundation, so make sure it’s rock solid!
Legs: Use 4x4s or 2x4s doubled up for legs, attached securely to the frame. You might want to add diagonal braces for extra support.
Lower Shelf: If you're adding storage, create a shelf beneath the top for tools or materials.
3. Create the Workbench Top:
Assemble: For a solid wood top, glue and screw together planks. For a plywood top, consider using thicker sheets for extra strength.
Smooth Finish: Sand the top to ensure a level, smooth surface for working. You can apply a finish like oil or varnish for protection.
Cutout for Saw: Carefully measure and cut out a hole in the workbench top for your table saw. Make sure it’s large enough for the saw’s base and has room for easy access to the blade.
4. Install the Table Saw:
Secure the Saw: Once the cutout is done, position the saw in the opening. Make sure the saw is level and securely fastened to the bench.
Adjustments: You might need to make minor adjustments to the saw’s height and position for optimal cutting.
Safety First: Use strong saw guards and a blade guard for safety. You can also add a dust collection system for a cleaner workspace.
5. Additional Features (Optional):
Tool Storage: Build drawers, shelves, or cabinets into the workbench for storing tools.
Work Light: Install a good work light above the saw and bench.
Outfeed Table: Add a separate outfeed table to the right of the saw for better control when cutting long boards.
Things to Keep in Mind:
Safety: This is a major project, so prioritize safety. Wear safety glasses, ear protection, and a dust mask.
Precision: Take your time with cuts and measurements. A well-built bench is more than just sturdy, it’s precise.
Personalize: Add your own touches â€" a custom finish, tool holders, or even a built-in miter gauge station.
Final Thoughts:
Building a combined workbench/table saw station takes some effort, but it's a rewarding project. The result is a workspace that's both functional and efficient. It's a huge upgrade for any woodworker!


